Testing electrical wires is an essential skill for anyone interested in home improvement, electrical repairs, or ensuring safety in their living environment. Whether you're a beginner or someone looking to enhance your knowledge, understanding how to test electrical wires properly can prevent accidents and ensure that your wiring is safe and functional. This guide will walk you through everything you need to know about testing electrical wires, from the basics to advanced techniques.
Electricity powers our homes and workplaces, but it can also pose significant risks if not handled correctly. Faulty wiring can lead to electrical fires, short circuits, or even electrocution. Learning how to test electrical wires is not only a practical skill but also a life-saving one. By following the steps outlined in this guide, you'll gain confidence in diagnosing and resolving wiring issues safely.
This comprehensive guide is designed for beginners who want to learn the fundamentals of testing electrical wires. Whether you're working on a DIY project or simply want to ensure your home's electrical system is safe, this article will provide you with all the information you need to get started. Let's dive in!
Read also:Ryan Goslings Memorable Role In Crazy Stupid Love A Deep Dive
Table of Contents
- Introduction to Testing Electrical Wires
- Essential Tools for Testing Electrical Wires
- Safety Precautions Before Testing
- Common Methods to Test Electrical Wires
- Testing Continuity in Electrical Wires
- How to Test Voltage in Electrical Wires
- Checking Grounding and Wiring Connections
- Troubleshooting Common Electrical Wire Problems
- Tips for Beginners in Testing Electrical Wires
- Conclusion and Next Steps
Introduction to Testing Electrical Wires
Understanding how to test electrical wires is a crucial skill for anyone involved in electrical work. Whether you're a homeowner or a professional electrician, knowing how to safely test wires can help you identify potential hazards and ensure the proper functioning of electrical systems. This section will cover the basics of electrical wire testing and why it's important.
Electrical wires are the backbone of any electrical system, carrying power from the source to various devices and appliances. Over time, these wires can degrade, become damaged, or develop faults. Testing electrical wires allows you to detect issues before they escalate into more serious problems. It also helps in diagnosing why a particular circuit might not be working as expected.
For beginners, the process of testing electrical wires might seem daunting at first. However, with the right tools and knowledge, it becomes a manageable task. In this guide, we'll break down the steps and provide you with the confidence to test electrical wires safely and effectively.
Essential Tools for Testing Electrical Wires
Before you begin testing electrical wires, it's important to have the right tools. Using the correct equipment ensures accurate results and enhances safety. Here are some essential tools you'll need:
1. Multimeter
A multimeter is a versatile tool used to measure voltage, current, and resistance. It's one of the most important tools for testing electrical wires. Modern multimeters come with various settings, allowing you to test different aspects of an electrical circuit.
2. Voltage Tester
A voltage tester is a simple device used to detect the presence of voltage in a wire or circuit. It's an easy-to-use tool that can quickly identify live wires without needing to touch them directly.
Read also:Anne Hathaway Husband A Closer Look At Adam Shulman
3. Continuity Tester
A continuity tester is used to check if there is a complete path for current to flow through a wire. This tool is essential for ensuring that wires are not broken or interrupted.
Other Tools:
- Insulated Screwdrivers
- Wire Strippers
- Gloves and Safety Goggles
Safety Precautions Before Testing
Safety should always be your top priority when working with electricity. Here are some important precautions to take before testing electrical wires:
1. Turn Off the Power: Always ensure that the power supply to the circuit is turned off before you begin testing. This can be done by switching off the main breaker or unplugging the device.
2. Use Protective Gear: Wear insulated gloves and safety goggles to protect yourself from electrical shocks or sparks.
3. Verify the Circuit is Off: Use a voltage tester to confirm that the circuit is indeed off before proceeding with any testing.
4. Work in a Dry Environment: Avoid working with electricity in damp or wet conditions, as water can increase the risk of electrical shock.
Common Methods to Test Electrical Wires
There are several methods you can use to test electrical wires. Each method serves a specific purpose and can provide valuable information about the condition of the wires. Below are some common methods:
1. Visual Inspection
Start by visually inspecting the wires for any signs of damage, such as fraying, discoloration, or exposed copper. This can help identify potential issues before moving on to more advanced testing methods.
2. Voltage Testing
Using a multimeter, you can measure the voltage across the wires to ensure that the correct amount of power is being delivered. This is crucial for diagnosing issues related to power supply.
3. Continuity Testing
Continuity testing checks whether there is a complete path for current to flow through the wire. This is important for ensuring that the wire is not broken or interrupted.
Testing Continuity in Electrical Wires
Continuity testing is a fundamental part of electrical wire testing. It helps determine whether a wire is intact and capable of conducting electricity. Here's how you can perform a continuity test:
1. Set the Multimeter: Switch your multimeter to the continuity setting, usually indicated by a diode symbol.
2. Touch the Probes: Place the probes of the multimeter on each end of the wire. If the wire is intact, the multimeter will emit a beep or show a reading indicating continuity.
3. Interpret the Results: If there is no beep or reading, it means the wire is broken or has a fault. Further investigation may be required to locate the issue.
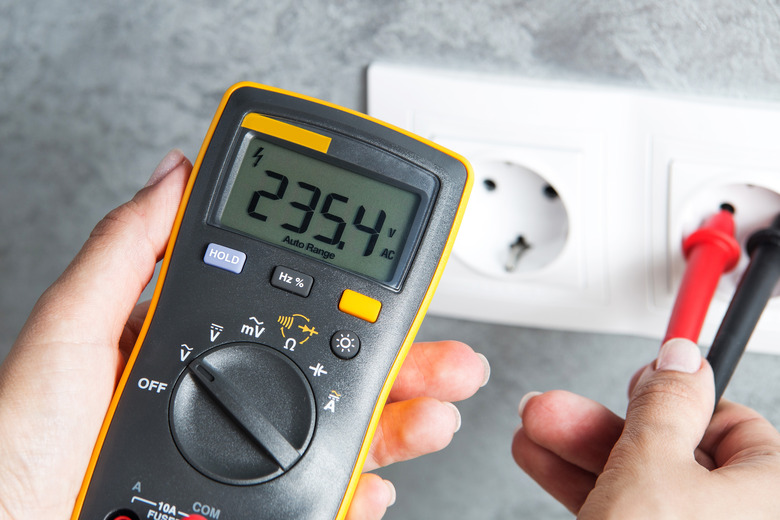
How to Test Voltage in Electrical Wires
Testing voltage is essential for ensuring that the correct amount of power is being delivered to your devices. Here's a step-by-step guide on how to test voltage in electrical wires:
1. Set the Multimeter: Adjust your multimeter to the voltage setting, selecting AC or DC depending on the type of circuit you're testing.
2. Connect the Probes: Place the red probe on the live wire and the black probe on the neutral or ground wire. Take note of the reading displayed on the multimeter.
3. Compare the Reading: Compare the reading to the expected voltage for the circuit. If the reading is significantly different, there may be an issue with the wiring or power supply.
Checking Grounding and Wiring Connections
Proper grounding and wiring connections are crucial for the safety and functionality of electrical systems. Here's how you can check these aspects:
1. Inspect Grounding: Ensure that all grounding wires are securely connected to the grounding terminal. A loose grounding wire can lead to electrical hazards.
2. Check Connections: Verify that all wiring connections are tight and free from corrosion. Loose or corroded connections can cause poor conductivity and overheating.
3. Test Ground Faults: Use a multimeter to test for ground faults by checking the resistance between the ground wire and the neutral wire. A high resistance reading may indicate a ground fault.
Troubleshooting Common Electrical Wire Problems
Even with proper testing, electrical wires can develop issues over time. Here are some common problems and how to troubleshoot them:
1. Open Circuit
An open circuit occurs when there is a break in the wiring, preventing current from flowing. To troubleshoot, perform a continuity test to locate the break and repair the wire.
2. Short Circuit
A short circuit happens when two or more wires come into contact, causing excessive current flow. Use a multimeter to detect short circuits by measuring resistance between wires.
3. Overloaded Circuit
An overloaded circuit can lead to overheating and potential fires. Check the amperage rating of the circuit and ensure that the connected devices do not exceed this limit.
Tips for Beginners in Testing Electrical Wires
Here are some additional tips for beginners looking to test electrical wires:
- Always follow safety protocols and use the appropriate tools.
- Start with simple circuits and gradually move on to more complex systems as you gain experience.
- Refer to the wiring diagrams provided with your electrical devices for guidance.
- Consider taking a basic electrical course to enhance your knowledge and skills.
Conclusion and Next Steps
Testing electrical wires is a vital skill that can help you ensure the safety and functionality of your electrical systems. By following the steps outlined in this guide, you can confidently test wires and diagnose common issues. Remember to always prioritize safety and use the right tools for the job.
We encourage you to practice what you've learned and continue expanding your knowledge in electrical work. If you found this guide helpful, please share it with others who might benefit from it. Additionally, feel free to leave a comment below with any questions or feedback. Happy testing!
Sources:
- Occupational Safety and Health Administration (OSHA)
- National Fire Protection Association (NFPA)
- Electrical Licensing Renewal