Replacing a bathtub faucet might seem intimidating, but with the right tools and guidance, it can be an easy DIY project. Whether you're upgrading your bathroom's aesthetics or fixing leaks, knowing how to replace a bathtub faucet can save you money and enhance your home's functionality. In this comprehensive guide, we'll walk you through every step, ensuring you complete the process efficiently and effectively.
Many homeowners dread plumbing tasks, assuming they require professional help. However, replacing a bathtub faucet is one of the simpler plumbing upgrades you can tackle yourself. With a few basic tools and a bit of patience, you can transform your bathroom's look and functionality without breaking the bank.
This guide will cover everything you need to know about replacing a bathtub faucet, from selecting the right tools and materials to troubleshooting common issues. Whether you're a seasoned DIY enthusiast or a beginner, this step-by-step tutorial will equip you with the knowledge and confidence to complete the job successfully.
Read also:Exploring The Talented World Of Richard Ayoade A Multifaceted Personality
Table of Contents
- Tools and Materials Needed
- Choosing the Right Bathtub Faucet
- Preparation Steps
- How to Remove the Old Faucet
- Installing the New Faucet
- Common Issues and Troubleshooting
- Maintaining Your New Bathtub Faucet
- Cost Considerations
- Environmental Impact of Upgrading Your Faucet
- Final Tips for Success
Tools and Materials Needed
Before you begin replacing your bathtub faucet, it's essential to gather all the necessary tools and materials. Having everything ready beforehand will make the process smoother and more efficient.
Tools
- Wrench or basin wrench
- Phillips and flathead screwdrivers
- Pliers
- Channel locks
- Silicone sealant or plumber's putty
- Teflon tape
Materials
- New bathtub faucet
- Replacement washers or O-rings (if needed)
- Clean rags or towels
- Bucket for water drainage
Ensure that the new bathtub faucet you choose matches your bathtub's specifications and mounting style. This will prevent complications during installation.
Choosing the Right Bathtub Faucet
Selecting the right bathtub faucet is crucial for both functionality and aesthetics. Consider the following factors when making your choice:
Types of Bathtub Faucets
- Deck-mounted faucets: Installed through the deck or rim of the bathtub.
- Wall-mounted faucets: Attached directly to the wall behind the bathtub.
- Freestanding faucets: Ideal for standalone bathtubs, offering a modern and luxurious look.
Materials and Finishes
Popular materials for bathtub faucets include brass, stainless steel, and chrome. Each material has its own advantages in terms of durability and appearance. Consider the finish as well, such as brushed nickel, polished chrome, or oil-rubbed bronze, to complement your bathroom's decor.
Additionally, ensure the faucet you choose is compatible with your home's water pressure and plumbing system. Faucets with single or dual handles can also affect the ease of use and style of your bathroom.
Preparation Steps
Proper preparation is key to a successful bathtub faucet replacement. Follow these steps to get ready for the installation:
Read also:Diva Flawless Unveils New Sex Videos A Deep Dive
Turn Off the Water Supply
Locate the shut-off valves under the bathtub or near the main water supply. Turn them off to prevent water from flowing while you work. If there are no shut-off valves, you may need to turn off the main water supply to your home.
Drain the Bathtub
Open the old faucet and allow any remaining water to drain out. Use a bucket to catch any excess water that might spill during the removal process.
Gather Your Tools
Ensure all your tools are within reach. Having everything organized will save time and reduce frustration during the project.
How to Remove the Old Faucet
Removing the old bathtub faucet requires careful attention to detail. Follow these steps to safely and effectively remove the existing faucet:
Step 1: Remove Decorative Caps
Some faucets have decorative caps covering the screws. Use a flathead screwdriver to gently pry them off.
Step 2: Unscrew the Handles
Using a Phillips screwdriver, remove the screws holding the handles in place. If the screws are corroded, apply a penetrating oil to loosen them.
Step 3: Disconnect the Water Supply Lines
Use a wrench or pliers to disconnect the water supply lines from the faucet. Be prepared for some water to drip out during this process.
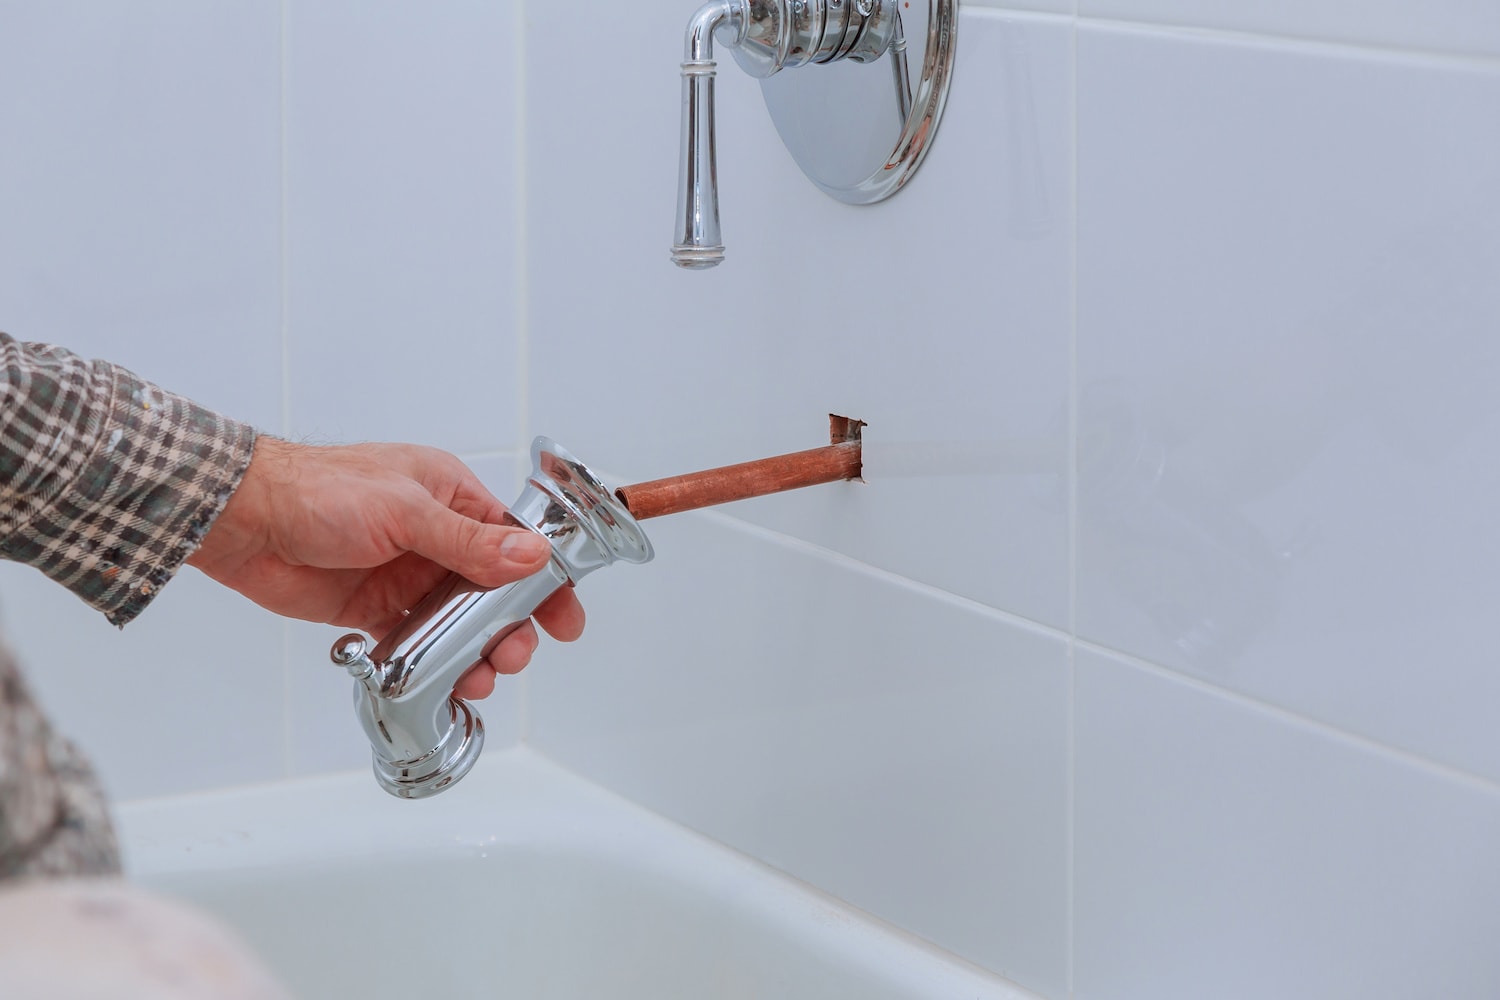
Step 4: Remove the Faucet Assembly
Depending on the type of faucet, you may need to unscrew it from the wall or deck. Use channel locks or a basin wrench to remove the assembly carefully.
Installing the New Faucet
With the old faucet removed, it's time to install the new one. Follow these steps for a smooth installation:
Step 1: Apply Sealant
Apply a small amount of silicone sealant or plumber's putty around the base of the new faucet to create a watertight seal.
Step 2: Secure the Faucet
Insert the new faucet into the mounting holes and secure it with the provided nuts and washers. Tighten them with a wrench, but be careful not to overtighten, as this can damage the faucet.
Step 3: Reconnect the Water Supply Lines
Wrap the threads of the water supply lines with Teflon tape to ensure a tight seal. Reattach the lines to the faucet and tighten them with a wrench.
Step 4: Test for Leaks
Turn the water supply back on and check for leaks around the connections. If you notice any leaks, tighten the connections further or reapply sealant as needed.
Common Issues and Troubleshooting
Even with careful installation, issues can arise. Here are some common problems and how to address them:
Leaking Faucet
If your new faucet is leaking, it could be due to improper sealing or loose connections. Double-check all connections and ensure the sealant is applied correctly.
Low Water Pressure
Low water pressure might indicate a blockage in the pipes or an incompatible faucet for your water system. Check the aerator and clean it if necessary. If the problem persists, consult a plumber.
Water Not Shutting Off
If the water doesn't stop flowing when the handle is turned off, the cartridge or valve stem may be faulty. Replace these components to resolve the issue.
Maintaining Your New Bathtub Faucet
Proper maintenance will extend the life of your new bathtub faucet. Here are some tips to keep it functioning optimally:
Regular Cleaning
Clean the faucet regularly with mild soap and water to prevent mineral buildup and maintain its shine. Avoid using abrasive cleaners that can scratch the surface.
Inspect for Leaks
Periodically check the connections for leaks and tighten them if necessary. Address any issues promptly to prevent water damage.
Replace Washers and O-Rings
Over time, washers and O-rings can wear out, leading to leaks. Replace them as needed to ensure a secure seal.
Cost Considerations
The cost of replacing a bathtub faucet can vary depending on the type of faucet and your location. On average, a quality bathtub faucet ranges from $50 to $300. If you're hiring a professional, labor costs can add an additional $100 to $200.
DIY installation can significantly reduce costs, but ensure you have the necessary skills and tools before attempting the project. If you're unsure, consulting a professional plumber is always a safe option.
Environmental Impact of Upgrading Your Faucet
Upgrading to a more efficient bathtub faucet can have a positive impact on the environment. Modern faucets often come with water-saving features that reduce water waste and lower utility bills.
Consider choosing a faucet with a WaterSense label, which indicates it meets EPA standards for water efficiency. This small change can make a significant difference in conserving water resources.
Final Tips for Success
Replacing a bathtub faucet is a rewarding DIY project that can enhance your bathroom's functionality and appearance. Remember the following tips for a successful installation:
- Take your time and follow the instructions carefully.
- Have a bucket and towels ready to catch any spills.
- Test the faucet thoroughly before considering the job complete.
In conclusion, replacing a bathtub faucet is an achievable DIY task with the right preparation and tools. By following this guide, you can confidently upgrade your bathroom's fixtures and enjoy the benefits of a modern, efficient faucet.
Feel free to leave a comment below if you have any questions or share this article with others who might find it helpful. For more home improvement tips, explore our other articles and resources.